Un anno fa aprivo il mio blog. In realtà il compleanno sarebbe stato il 21 ma era il giorno che il cucciolo/ragazzo partiva per la prima volta da solo per una vacanza sulla neve e non ho avuto tempo per festeggiare. Non mi interessa fare alcun tipo di bilancio ma solo limitarmi a ringraziare chi mi ha spinta a questo passo (grazie Sandrina tesoro) ed ha fisicamente impostato il blog. E’ servito a qualcosa? Certo. A me stessa, perché è diventato come del resto era l’intenzione, una sorta di diario ed anche se molto spesso quello che ho scritto non l’ho pubblicato per pudore, mi ha comunque permesso di buttarlo fuori. Grazie a lui ho conosciuto veramente delle belle persone a riprova che non sempre virtuale è uguale a superficiale. Con il gruppo delle Bloggalline per esempio, partirà a breve un bellissimo progetto che spero coinvolgerà anche me e comunque, anche se tutto dovesse restare così com’è, il mio blog andrà avanti e mio figlio avrà il suo diario di famiglia da rileggersi, se mai  avesse nostalgia di questi momenti

Questa ricetta è in realtà un mix. La ricetta iniziale era di Martha Stewart ma poi mi è scappato l’occhio in fondo al post ed ho visto un sacco di commenti su come la torta non stesse su e crollasse durante la cottura, su come fossero sbagliate le dosi e non uno ma numerosi; la torta però mi era ormai entrata in testa e quindi mi sono messa a cercarne un’altra versione e sono capitata su quella di Nigella Lawson. Alla fine ho usato la ricetta di Nigella con parte dell’esecuzione di Martha Stewart. Se voleste rischiare con l’originale,  lo trovate qui, mentre la ricetta di Nigella è qua
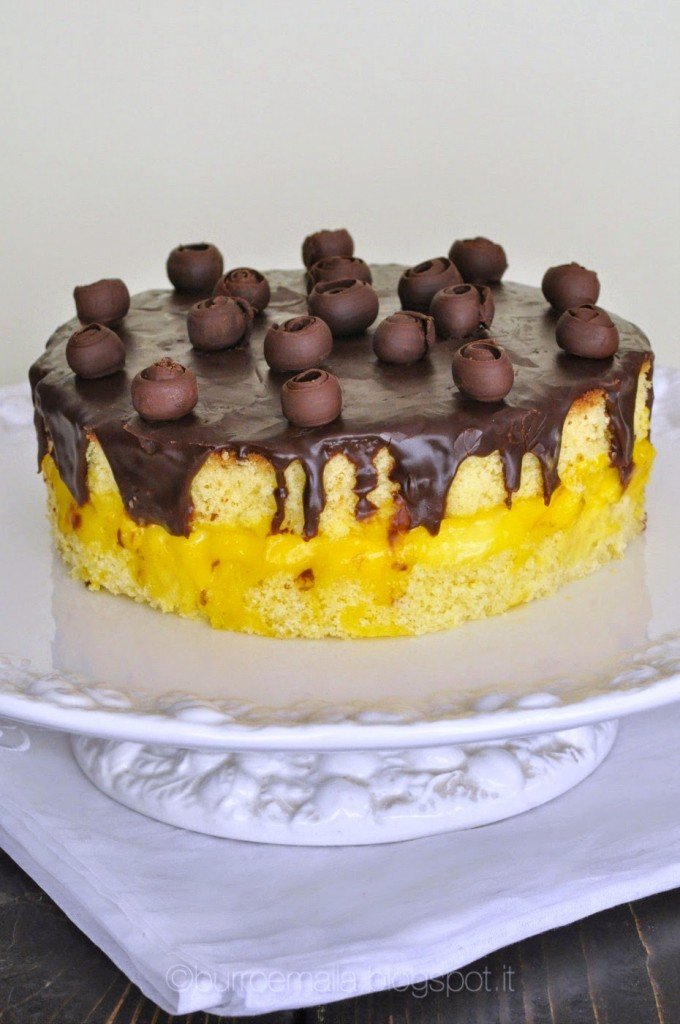
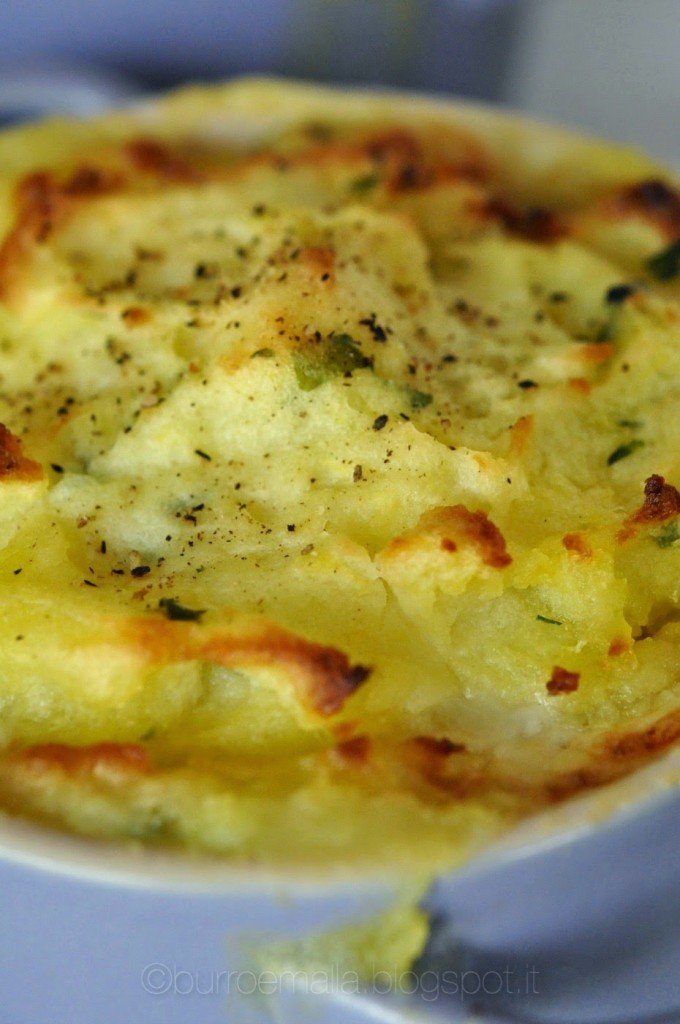
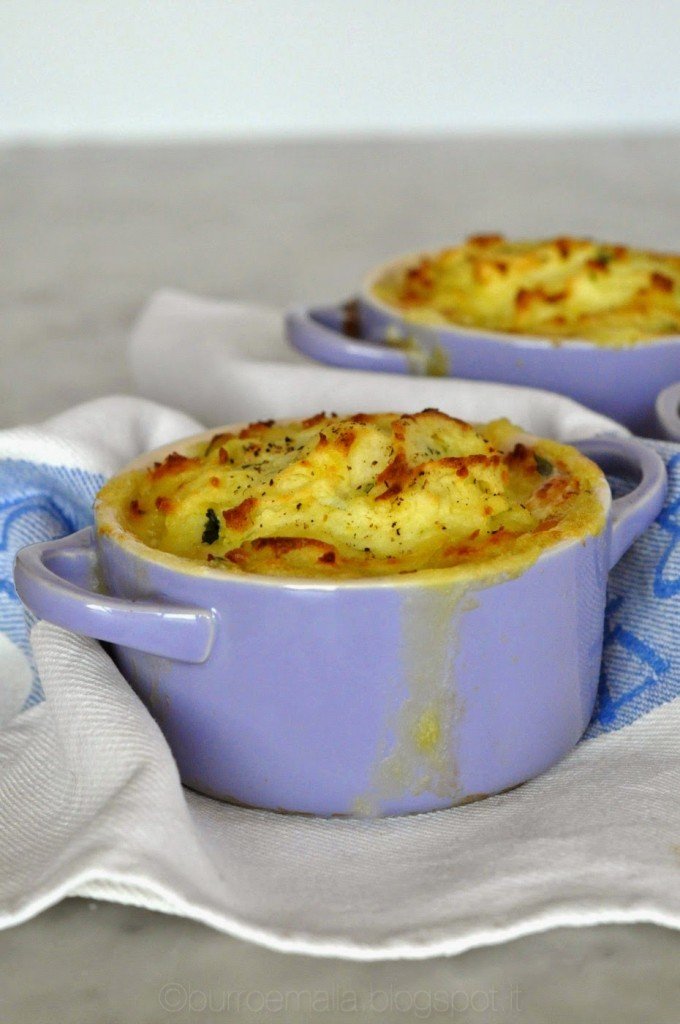
Ingredienti per una tortiera da 20:
225 g burro a temperatura ambiente
225 g zucchero
200 g di farina
3 cucchiaini di lievito chimico
Un cucchiaino di estratto di vaniglia
4 uova
25 g di amido di mais
3,4 cucchiai di latte (che io non ho messo)
Per la crema pasticcera:
125 ml di latte intero
125 ml di panna fresca
Un baccello di vaniglia
3 tuorli
50 g di zucchero
15 g di farina
Un pizzico di sale
Per la copertura:
150 ml di panna fresca
Un cucchiaino di estratto di vaniglia
Un cucchiaino di burro
150 g di cioccolato fondente


Torta

Preriscaldate il forno a 180°. Imburrate due tortiere da 20 cm di diametro (io ne ho usata una sola ma di quelle molto alte e poi ho diviso la torta in due). Nella ciotola del Kenwood mettete il burro e lo zucchero e con la frusta mescolate finché il composto non sarà chiaro e gonfio. Aggiungete poi la vaniglia e le uova intervallate dalla farina setacciata con il lievito ed infine il latte ma solo se ritenete che l’impasto sia troppo sodo. Rovesciate nelle due tortiere oppure in una con i bordi alti e cuocete per circa 25 minuti.
Crema pasticcera:
Sbattere i tuorli in una ciotola e metterli da parte. In un tegame medio mettete lo zucchero, il latte, la panna, la farina e il sale ed usando una frusta girate bene affinché non ci siano grumi. Cuocete su fuoco medio mescolando continuamente finché il composto non si rassoderà ed incomincerà a bollire (circa 5 minuti). Togliete dal fuoco immediatamente e versate il latte nella ciotola delle uova sempre mescolando. Riportate il tutto nel tegame e portate di nuovo ad ebollizione (3 minuti). Trasferite in una ciotola media, unite i semini della vaniglia e mettete la ciotola a freddare in una ciotola più grande con acqua e ghiaccio. Girate di tanto in tanto finché il composto non sarà freddo e poi coprite con pellicola trasparente che dovrete mettere a contatto della crema per evitare che si formi la pellicina quando verrà riposta in frigo.
Dividete la torta in due strati. Spalmate lo strato inferiore con la crema fredda e mettete in frigo per 30 minuti.
Copertura:
In un tegame piccolo mettete il cioccolato, il burro e la panna. Riscaldate l’acqua in un contenitore più grande, aspettate che l’acqua cominci a muoversi quindi appoggiatevi il tegamino con la cioccolata mescolando di tanto in tanto, finché il cioccolato non sarà completamente sciolto (12 minuti circa). Togliete dal fuoco, unite l’estratto di vaniglia e fate raffreddare 15 minuti.
Togliete il dolce dal frigo, copritelo con la parte superiore, trasferitelo sul piatto di portata e versatevi sopra la glassa facendola colare in modo irregolare giù dai bordi. Aspettate almeno una mezz’ora prima di servirlo.


English version:

Just a year ago, the 21th of January I opened my blog but I have not be able to celebrate that day because my child /boy has gone alone skiing for the first time. I do not care about
but want only to thank who pushed me to open it up (thanks Sandrina love) and physically set the blog. Has it been worth opening it? Well, surely to myself because it has become a sort of diary and although very often I don’t post what I have written, at least writing it down serves to get rid of some of the bad feelings. Thanks to the blog I have met really nice people as a proof that virtual is doesn’t always mean superficial. With the Bloggalline group, for example, we are starting a beautiful new project that I do hope will involve me as well but if it won’t, my blog will go on and my son will have his family diary to read, whenever he will long for these moments.

This recipe is actually a mix. The original recipe was Martha Stewart’s but there were so many negative posts about this cake like it collapse in the oven and the doses are wrong that I have decided to try another recipe, the one of Nigella Lawson, using the execution of Marta Stewart. If you want to risk, the original is here and Nigella’s version is here

Ingredients for a baking tray of 20 diameter:
Cake:
225 g unsalted butter
225 g caster sugar
1 teaspoon of vanilla extract
4 large eggs
200 g of self-raising flour
or
200 g plain flour + 3 teaspoon of baking powder
25 g cornflour
3,4 tablespoons milk (that I did not use)
For the creme patissiere:
150 ml double cream
150 ml full fat milk
1 vanilla pod
3 large yolks
50 g caster sugar
15 g plain flour
For the icing:
150 ml double cream
1 teaspoon vanilla extract
1 teaspoon unsalted butter
150 dark chocolate


Cake:
Preheat the oven to 180° and grease two sandwich tins .
Cream butter and sugar, add the vanilla and the eggs, one at time, adding flour in between. If you need add a little mix. Pour the batter into the tins and cook for 25 minutes.
Creme:
Prepare an ice-water bath. In a large bowl whisk yolks and set aside. In a medium saucepan combine sugar, milk, cream, flour and salt. Cook over medium heat, stirring constantly, until mixture thickens and begins to bubble (about 5 minutes). Remove from heat. Whisking constantly, slowly pour the hot milk misture into yolks. Return mixture to saucepan. Cook over medium heat, stirring constantly, until begins to bubble (about 3 minutes). Remove from heat. Stir in the vanilla, transfer filling to a medium bowl. Place the bowl in the ice bath. Stir from time to time. Cover with plastic wrap pressing it against the filling to prevent a skin from forming. The filling may now be refrigerated or ready to use.
Split cake in two layers. Spread bottom with chilled filling and place in the refrigerator to set for about 30 minutes.
Icing:
In a medium size heat proof bowl, set over a pot of gently simmering water, combine chocolate, heavy cream and unsalted butter. Stir occasionally until chocolate melts, about 12 minutes. Remove form heat, stir in the vanilla extract and set aside to cool for 15 minutes.
Remove cake from refrigerator. Top with the top layer, transfer cake to serving plate and pour chocolate glaze over top. Allow to set 30 minutes before serving.
11 comments
0 FacebookTwitterGoogle +Pinterest

Tanto tempo fa c’era un forum meraviglioso al quale partecipavo attivamente. Ci conoscevamo tutte anche se non ci eravamo mai viste, ci scambiavamo indifferentemente ricette e consigli di sciroppi per la tosse per nostri bambini, ci consigliavamo libri e film e lì ridevamo oppure andavamo a piangere quando i mariti ci facevano arrabbiare. Le ricette erano tante, spesso studiate a 4 o a 6 mani e collaudate da una serie infinita di compleanni, buffet di prime comunioni o feste a scuola ed alcune di queste sono ovviamente diventate parte integrante dei miei piatti di famiglia. Non ci eravamo mai scambiate né indirizzi mail né cognomi ma conoscevamo molto una delle altre e condividevamo tanto delle nostre vite. Una mattina però mi sono connessa e il forum non c’era più. Così, da un giorno all’altro se ne era andato un pezzo della mia vita, tutti i nostri commenti, le nostre chiacchierate, le nostre ricette. Non avevo mai riflettuto a fondo su quanto in un certo senso fosse effimero quello che stavamo facendo, come del resto molto di quello che passa per la rete, niente di scritto se non lì sopra, niente back up possibili, d’improvviso il vuoto. Non avevo la possibilità di contattare nessuno, continuavo disperatamente ed ostinatamente a riaprire la pagina ma niente. Da allora il forum è sparito per sempre ed io sono ancora qua a chiedermi cosa sia successo. Tutto ciò che mi resta sono poche ricette che per praticità mi ero stampata e qualche nome che ogni tanto ritrovo in rete associato ad alcune di esse. Nient’altro. Questa ricetta è una di quelle rimaste che preferisco e che spesso costituisce lo snack box di mio figlio per la scuola. Veloce, semplice ma tanto tanto buona. E’ un impasto molto simile a quello della rosticceria siciliana, la pizza che ne risulta è molto alta, con una nota leggermente zuccherata ed incredibilmente soffice. Non posso fare a meno, ogni volta che tiro fuori il quaderno con la ricetta, di riandare col pensiero a quel periodo e sempre mi prende la nostalgia.

Forse ora che sono entrata a far parte delle Bloggalline il buco pian piano si colmerà…


Ingredienti:

380 g di farina 00 (io Petra 1)
120 g di semola rimacinata
230 g di latte intero tiepido
5 g di lievito compresso
50 g di olio evo
Un uovo
Un cucchiaio di zucchero
Mezzo cucchiaio di sale
Per condire
Passata di pomodoro
Sale
Pepe
Zucchero
Mozzarella fiordilatte

Mettete le due farine setacciate nella ciotola dell’impastatrice ed aggiungete il latte precedentemente intiepidito insieme allo zucchero e l’olio. Cominciate ad impastare a bassa velocità finché l’impasto non si compatterà quindi aggiungete il sale e subito dopo l’uovo e lavorate nuovamente fino a che l’impasto non diventerà liscio e non troppo sodo. A questo punto la scelta è vostra. Potete fare delle pizzette (se avete gli stampini adatti) oppure userete una teglia grande e poi la taglierete a quadratini una volta cotta. L’effetto delle pizzette è molto carino ma le teglie sono tanto più pratiche.. Oliate leggermente la teglia/e che avrete scelto quindi dividete l’impasto in palline oppure lasciatelo intero e depositatelo nella teglia. Schiacciate con i polpastrelli fino a che non sarà steso in modo uniforme e poi distribuitevi la passata di pomodoro condita con sale, pepe e zucchero e mettete a lievitare. Quando sarà pronto, l’impasto dovrà uscire dagli stampi. Mettete ancora un po’ di pomodoro,  perché si sarà asciugato, distribuitevi della mozzarella tagliata a dadini quindi infornate a 200° per 10/15 minuti circa per le pizzette e 20 per la teglia.


Versione Bimby


Mettete il latte e lo zucchero nel boccale: 1 min. 37° vel. 2. Aggiungete il lievito: 15 sec. vel. 4
Ora mettete le farine setacciate, l’uovo, l’olio ed il sale: 30 sec. vel. 4 quindi 1 min. vel. Spiga.
Per il resto seguite le istruzioni della ricetta. 


English version:

 
A long time ago there was a wonderful forum where I used to partecipate actively. We knew each other even though we’ve never seen, we exchanged recipes and tips of the best coughing syrups to use for our kids, favorite books and movies and it was there we were running when our husbands made us angry. The recipes were so many, often studied in 4 or 6 hands and tested by an endless series of birthday parties, First Communion buffets and parties and some of these are obviously now my family recipes. We had never exchanged surnames or emails addresses because there was no need but we knew a lot one of the others and we shared much of our lives. Then, one morning I connected and the forum was gone. So, from one day to another, it was gone a piece of my life, all our chats, our comments, our recipes. I had never thought deeply about how ephemeral was what we were doing, like much of what passes through the net, with no backup possible (at that time), nothing written down for real. Suddenly the emptiness. I had no opportunities to contact anyone so I desperately and obstinately kept trying to open the page but nothing. Since then, the forum is gone for good and I’m still here trying to figure out what happened. All is left are few printed recipes and some names that I occasionally find in the web associated with some of the recipes. Nothing else. This one is one of those and my favorite for my son’s snack box. Fast, simple and very very good. The dough is very much alike the Rosticceria siciliana so the pizza will results will be very thick, with a lightly sweet note and incredibly soft. I cannot help myself but every time I take the notebook with this recipe I go back in time to that wonderful period and I feel blue. Maybe now that I’m part of Bloggalline the hole will slowly fill up..Ingredients:

380 g of bread flour
120 g re-milled durum wheat
or
500 g bread flour
230 g of full fat milk, lukewarm
5 g of compressed yeast
50 g of extra virgin olive oil
An egg
A tablespoon of sugar
Half tablespoon of salt

To season:

Tomato sauce
Salt
Pepper
Sugar
Mozzarella cheese

Instructions:

Put the two flours in your stand mixer bowl and add the lukewarm milk with sugar and oil. Begin to knead at low speed until the dough will compact then add the salt and immediately after, the egg. Work again until the dough will be smooth but not too hard. Next step depends on your choice. If you’ll make small pizzas you will need small molds or you can use a large circle baking tray or a rectangular one. The small pizzas look it’s very nice indeed but trays are much more pratical. Anyway, lightly oil whatever you had chosen than either divide the dough in 10 balls or only one and deposit it/them on the tray/moulds. Flatten using your hands and then spread the tomato sauce seasoned with salt, pepper, sugar and, if you like, some grated garlic and leave to rise inside the oven with the light on. When it will be ready, the dough will overflow from the molds. Put some more tomato sauce because it will be a bit dry, put some mozzarella top then bake in preheated oven at 200° for 10/15 minutes for the small pizzas and 20 for the baking tray.


Thermomix version:

Put the milk and the sugar in the TM bowl: 1 min. 37° speed 2.
Add the yeast: 15 sec. speed 4.
Now pour in the two flours, sifted, the egg, oil and salt: 30 sec. speed 4 then knead 1 minute Dough setting. For the rest, follow the recipe

Mando subito un bel vassoio di pizzette a Sandra per Panissimo, la raccolta mensile di lievitati sua e della Barbara di Bread and Companatico

e dalla gemellata Polacca Zapach Chleba


16 comments
0 FacebookTwitterGoogle +Pinterest

Fish pie

by burroemalla
E si ritorna lentamente alla normalità. Sveglia puntata alle 6,30 del mattino, alle 7 già in mezzo ai campi (la fermata del pulmino è veramente in mezzo ai campi) e poi giornate passate a rincorrere chissà cosa, ancora ho da capirlo. Unica costante oltre agli affetti (pochi), questo blog che mi tiene compagnia e che sta per compiere un anno. Niente bilanci, solo la voglia di continuare su questa strada che mi sta dando alcune soddisfazioni e soprattutto mi ha permesso di conoscere delle gran belle persone (oltre a portarmi il colesterolo da 190 a 248). Volevo iniziare l’anno con una ricetta bruciagrassi ma il semplice filetto di pesce non era da foodblogger e poi il cucciolo/ragazzo non lo gradisce il pesce nature, così la preparazione è inevitabilmente diventata più ricca.
La ricetta è una tradizionale ricetta inglese, un vero confort food e questa versione in particolare è di Jamie Oliver.


Ingredienti:
1 Kg di patate
150 g di Cheddar o formaggio tipo Gouda
300 g di filetti di merluzzo o salmone fresco
150 g di panna fresca
Una carota
Un pezzetto di sedano
La metà di una cipolla piccola
Olio evo/burro
Limone
Prezzemolo
Sale e pepe


Esecuzione:
Prima di tutto mettete a bollire le patate tagliate a pezzi grossi in acqua con poco sale. Nel frattempo tagliate i filetti in pezzi un poco più piccoli, metteteli in una ciotola e conditeli con un poco di limone spremuto, olio d’oliva, sale e pepe. Fate soffriggere in poco olio la carota, il sedano e la cipolla tritati quindi versateli nella ciotola sopra al pesce, unitevi la panna fresca, il cheddar grattatugiato con la grattugia a fori grossi e mescolate cercando di non rompere troppo il pesce che dovrà rimanere a pezzetti. Salate e pepate. Imburrate 4 cocotte da forno e disponetevi il composto di pesce e panna.
Passate al setaccio le patate, conditele con sale, pepe e un poco di olio o burro e coprite con un bello strato il composto di pesce. Usate la forchetta per rendere la superficie un po’ rialzata qua e la, un’altra grattata di pepe macinato e quindi cuocete in forno preriscaldato a 200° per 20 minuti circa fino a che non avrà formato una bella crosticina dorata.
 
 
English version
And we are slowly returning to normal. Wakes up at 6,30 in the morning, at 7,00 already in the fields (the school bus really does stop in the middle of fields) and days spent chasing something I still have to figure out. The only stable point, my loves (few) and this blog that consoles me and which is going to celebrate its first birthday shortly. No evaluations, only the wish to continue on this path that is giving me some satisfactions and let me know very nice people (in addition to having raised my cholesterol from 191 to 248). I wanted to start the year with a low fat fish recipe but plain fish is not a food blogger recipe and besides, my son doesn’t like fish nature, so the recipe has become richer.
This is a traditional English recipe, real comfort food, and this version comes from Jamie Oliver.


Ingredients:
1 Kg potatoes
150 Cheddar or Gouda
300 gr cod or salmon fillets
150 fresh double cream
One carrot
A stick of celery
Half of a small onion
Extra virgin olive oil/butter
A squeeze of lemon
Parsley
Salt and pepper
First of all, peel the potatoes and boil them in hot salted water until they are be done.
In the meanwhile cut the fish fillets in chunks, put them in a bowl and season with the lemon, extra virgin olive, salt and pepper. Chop the carrot, the celery and the onion finely and sauté
in a bit of oil then add to the fish fillets, together with the fresh double cream and the cheddar grated roughly. Mix carefully trying not to break the chunks and season with salt and pepper.
Grease 4 cocottes and pour in them the fish mixture, cover with the potatoes, mashed, season with salt, pepper and a bit of oil or butter and bake in preheated oven at 200° for 20 minutes, until it will be crisp and golden on top.


11 comments
0 FacebookTwitterGoogle +Pinterest

Paste di mandorla

by burroemalla
Natale si avvicina a grande velocità. Basta guardarsi intorno per vedere gente che corre qua e là come invasata alla ricerca dell’ultimo regalo come se ne andasse della propria vita. Bisognerebbe invece godere di più proprio il periodo pre natalizio, per quella stupenda sensazione di attesa che spesso è ancor più bella di quello che realmente verrà. Io, complice l’influenza del bambino/ragazzo, sto passando questi momenti a casa, tra un MasterChef e l’altro, con qualche pausa per mangiare paste di mandorla. Una delle cose che infatti la sera della vigilia non mancano mai sulla mia tavola, sono queste paste di mandorla che produco in grandi dosi e che ci accompagnano prima e durante le vacanze. Restano morbide a lungo, basta conservarle in una scatola di latta all’interno del frigo e danno incredibili soddisfazioni sia allo stomaco che all’amor proprio ed è proprio con queste che vi saluto e auguro a tutti un buon Natale
La ricetta è quella di Anna sul forum di Gennarino.
Ingredienti:
1 Kg di farina di mandorle
800 g di zucchero a velo
8 albumi
Scorza grattugiata di un limone
Zucchero a velo per spolverizzare le paste di mandorla
Esecuzione:
Impastate la farina con lo zucchero a velo, gli albumi e la scorza grattugiata fino a che non otterrete un composto omogeneo, quindi trasferitelo in un contenitore con il tappo e fatelo riposare in frigo tutta la notte. Il giorno dopo spolverizzate la spianatoia di zucchero a velo e formate dei rotolini che poi piegherete fino a formare una S. Sistemate le paste di mandorla su di una teglia coperta da carta forno e cuocete per 15 minuti a 180° (attenti perché non dovranno assolutamente colorire). Col mio forno sono bastati 10 minuti. Quando saranno intiepiditi, spolverizzate con altro zucchero a velo.
Io li conservo in una scatola di latta che tengo in frigorifero.
English version
Christmas is coming very quickly. You just need to look around and you will notice people running around like crazed seeking the last gift to buy but we should instead enjoy the pre Christmas for that wonderful feeling of anticipation which is, often, even more beautiful than Christmas itself. I’m passing these days at home with my kid who is sick, watching one MasterChef after another with occasional breaks to eat paste di mandorla.
This paste di mandorla are one of the thinks that’s always on my table for Christmas Eve. I cook them in large quantity so they accompany us before and during holidays. They stay soft for a long time if you just keep them in a tin box inside the fridge and give great satisfaction to both stomach that self-esteem and that’s why this is my recipe to wish you all a merry Christmas
Ingredients:
1 Kg of almond flour or homemade ground almonds
800 g of icing sugar
8 egg whites
Grated rind of one lemon
Icing sugar to sprinkle
Mix the almond flour with the icing sugar, the egg whites and the lemon rind. You must get a smooth mixture.
Transfer it in a container with lid and let it stand in the fridge overnight.
The next day sprinkle the pastry board with icing sugar, form small rolls and give them an S form. Put the paste di mandorla on a baking sheet covered with parchment paper and cook for 15 minutes at 180° (be careful because they won’t have to change color) With my oven it took only 10 minutes.
Only when they will have cooled a bit, sprinkle with some more icing sugar.


10 comments
0 FacebookTwitterGoogle +Pinterest

Pandolce di Natale

by burroemalla


Il fallimento del mio primo pandolce realizzato con il licoli mi ha convinto, lo scorso gennaio, a passare ad un’impastatrice a braccia tuffanti ed infatti quest’anno il Pandolce mi è riuscito al primo colpo. Di certo non è il Panettone ma per quel che mi riguarda è un sostituto ottimo. I fichi secchi che io adoro, le scorze candite, la glassa, tutto profuma di Natale anche se per me quest’anno il Natale non sarà un’occasione gioiosa come quelli passati. Beh, certamente, almeno per quel che mi riguarda, nei momenti tristi lo zucchero aiuta quindi vedrò di non farmelo mancare incominciando proprio col Pandolce. Per tutto il resto cercherò di fare mio il detto “finché c’è vita c’è speranza”!
La ricetta è quella utilizzata da Sara Papa nel suo corso “I pani di Natale” dello scorso anno a Viareggio.
Ingredienti:
Biga
200 g di farina Petra 1
50 g di lievito madre o 100 g di licoli o 7 g di lievito compresso
120 g di latte intero
20 g di tuorlo
Impasto
300 g di farina
70 g di latte intero
70 g di tuorlo
50 g di uovo
120 g di zucchero (io 170)
120 g di burro
140 g di fichi secchi a cubetti
Scorza di un’arancia grattugiata (io 150 g di scorza candita di arance e cedro)
5 g di aroma di mandorla (io un cucchiaio di estratto di vaniglia home made)
2 g di sale
1 cucchiaio di massa aromatica per panettone (io no)
200 g di rum (io no)
Glassa
100 g di zucchero
100 g di nocciole tritate
70 g di farina debole
70 g di albume
Per decorare 
Granella di nocciole e granella di zucchero
Il giorno prima preparate la glassa mescolando tutti gli ingredienti insieme fino ad ottenere un composto omogeneo. Partite anche col rinfresco della pasta madre (nel mio caso del licoli) che ho rinfrescato ben 3 volte. Alla sera ho preparato poi la biga e l’ho messa a lievitare protetta da pellicola dentro al forno con la cucina accesa per tutta la notte. Al mattino ho preparato l’impasto mettendo nella ciotola della Miss Baker la farina con il licoli sciolto in un pochino della dose di latte tiepido ed ho fatto andare 5 minuti, quindi ho aggiunto tutti gli altri ingredienti esclusi i fichi, i canditi,  il burro ed il sale. Ho lavorato fino a quando la massa non ha incominciato ad incordare (15 minuti circa) ed ho poi aggiunto il sale ed il burro un poco per volta senza perdere l’incordatura. Solo alla fine ho unito le scorze candite e i fichi a dadini. ho aspettato che fossero incorporati nell’impasto, l’ho tolto dalla ciotola ed ho fatto riposare una mezz’ora. L’ho quindi pirlato e gli ho dato una forma tondeggiante e poi l’ho messo nello stampo di carta del panettone ed ho messo nuovamente all’interno del forno con la cucina accesa a lievitare. Per ottenere che l’impasto triplicasse mi ci sono volute 8 ore. Ho poi messo la glassa distribuendola con l’aiuto di una sac a poche, ho spolverizzato con la granella di zucchero e di nocciole ed ho cotto in forno preriscaldato a 150° per un’ora o poco più. Ho poi provveduto a far raffreddare a testa in giù utilizzando dei sostegni ed i ferri da calza e, come imparato nel caso della colomba, ho lasciato riposare per 3 giorni prima di assaggiare. Oltre, non sono riuscita!
English versionThe failure of my first liquid sourdough starter Pandolce in December, convinced me to buy a professional twin arm mixer and the machine finally gifted me with a very nice Pandolce. Not the Panettone but a great substitute indeed. Dried figs, candied oranges, everything smells of Christmas even though the coming Christmas won’t be a joyous one. for me Well, at least as far as I’m concerned, when I’m sad sugar always helps so the Pandolce will do. And for the rest “‘til there’s life there’s hope”!


Ingredients:

Starter
200 g of flour
50 g sourdough starter or 100 g of liquid sourdough starter or 7 g compressed yeast
120 g full fat milk
20 g yolk

Dough
300 g flour
70 g full fat milk
70 g yolk
50 g eggs
170 g sugar
120 unsalted butter
140 dried figs cut roughly
150 g of candied oranges and citron
A tablespoon of vanilla extract
2 g of salt

Icing
100 g sugar
100 chopped hazelnuts
70 g flour
70 g egg whites

To decorate
Hazelnuts and sugar grains

The day before start preparing the icing mixing all the ingredients together with a beater. The icing will have to stand for a day. You will need to have your sourdough starter alive and kicking (feed it at least 2/3 times) and you will mix it with the other ingredients for the starter, flour, milk and yolk. Then you will cover the bowl with plastic wrap and let it rest all night inside your oven with the light on. In the morning prepare the dough putting in your standing mixer bowl the flour with the starter dissolved in a little bit of the lukewarm milk and knead for 5 minutes, then add all the other ingredients except the candied oranges, the figs, the butter and salt and knead for other 15 minutes. Add the salt, the butter little by little and knead until the dough won’t be elastic and smooth then incorporate the figs and the candied oranges for 2,3 minutes. Let the dough stand for half an hour then give it a round shape and put it in a panettone paper mould and put it back in the oven with the light on for 8/9 hours. At the end distribute the icing using a sa a poche, sprinkle with granulated sugar and hazelnut grains and cook in a preheated oven at 150° for an hour or so. Cool it upside down  inserting two netting needles in the bottom of the Pandolce then hang it on two boxes and try not to eat it before then 3 days.

Questo Pandolce viene subito impacchettato e spedito a Panissimo la raccolta mensile di pani e lievitati in genere della mia amica Sandra e di Barbara di Bread and companatico

e, visto che ci sono, anche dalla gemellina polacca Zapach Chleba


17 comments
0 FacebookTwitterGoogle +Pinterest